5. Start the registration
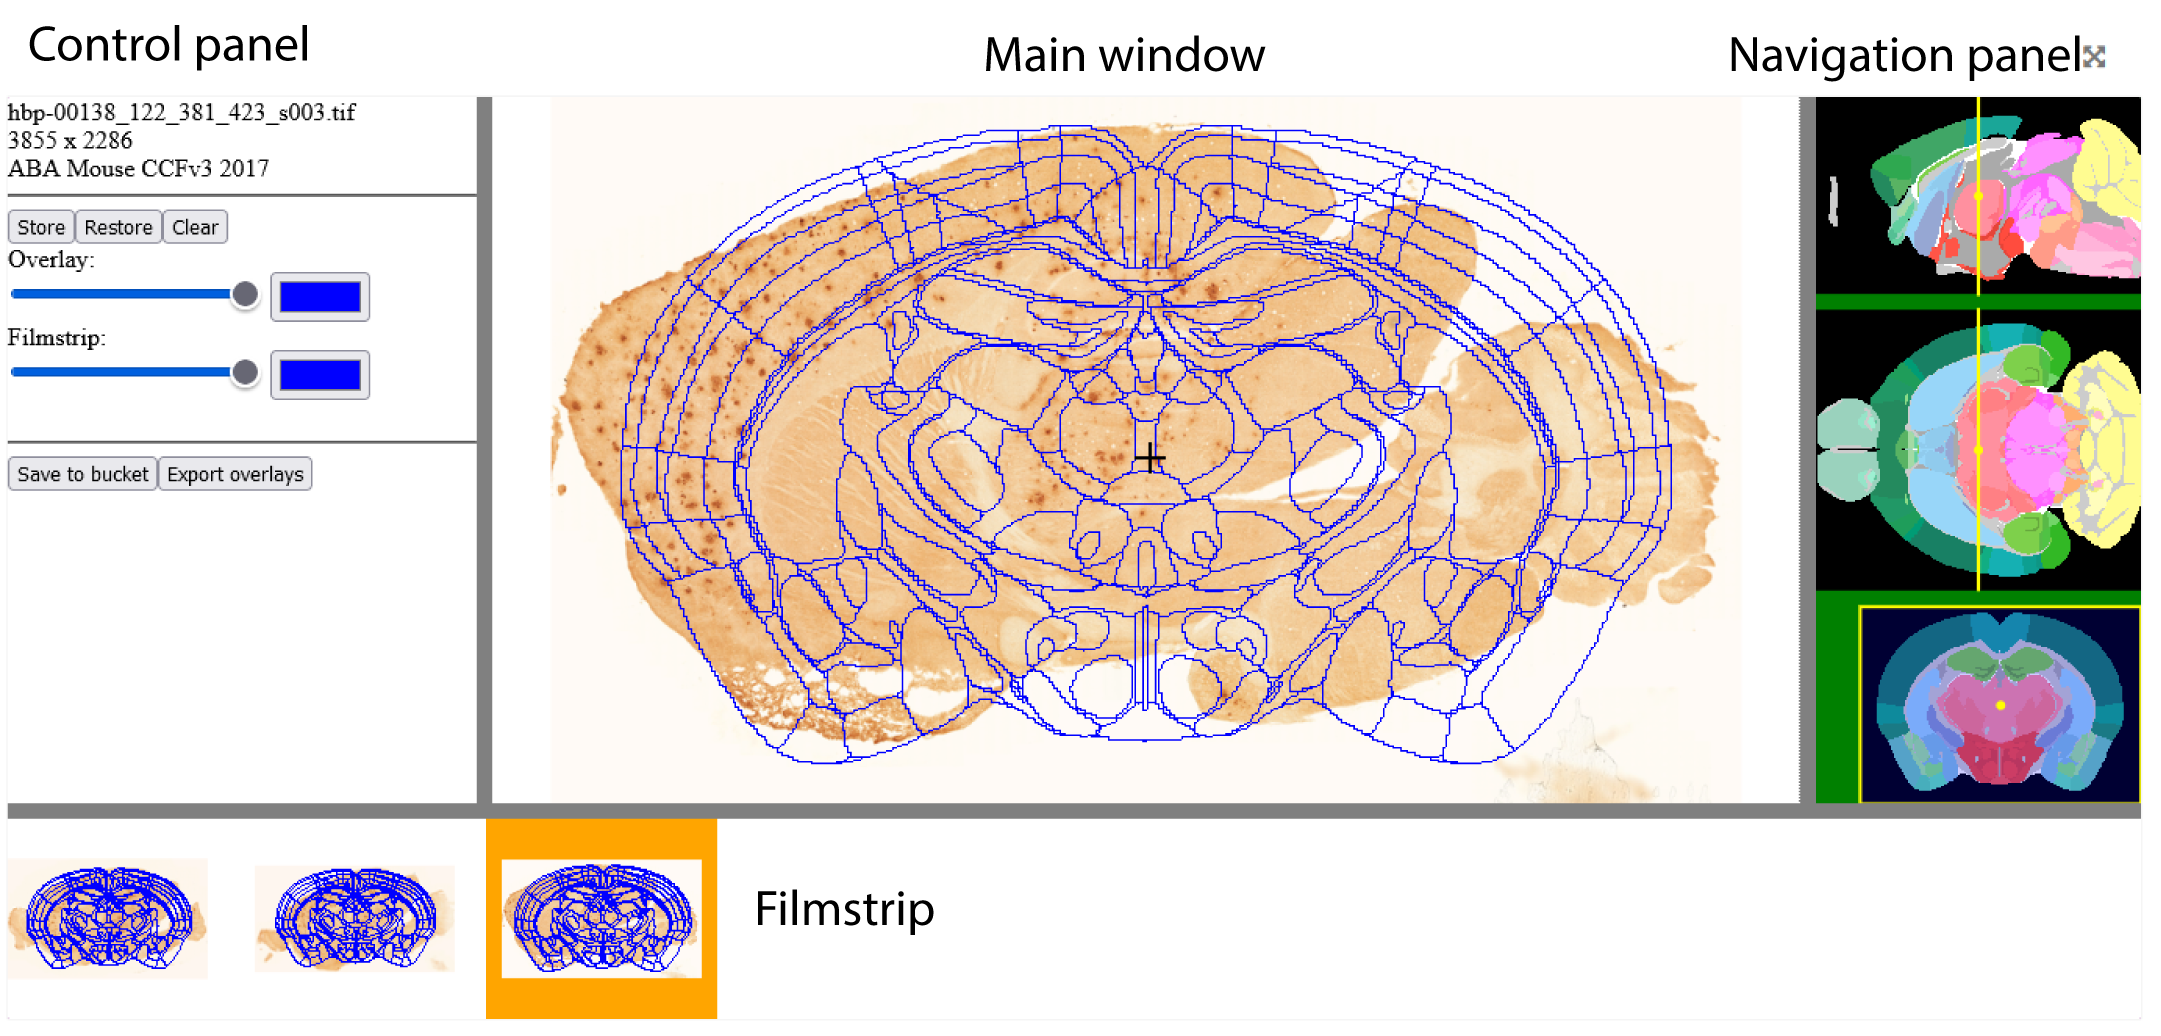
The main window shows the selected image with the atlas overlay.
Dataset DOI: 10.25493/G6CQ-D4D
Note
If necessary, change the atlas from coronal view to sagittal or horizontal view (see Navigation panel below)
Move the atlas to the approximate position of your section using the yellow dots in the three small windows from the navigation panel.
Start anchoring by placing a marker with the “Space bar” , it is initially a cross, and it is the fix point of (most) transformations. The “Escape key” can be used to remove the marker.
The main window supports mouse drag in multiple modes in order to stretch the atlas and find the correct position.
If there is no marker, or the marker is a cross, mouse drag slides the cut in its plane (translation).
Note
The panel can be resized towards the left (common border with Control Panel) and towards the bottom (common border with Filmstrip).
Save the position by pressing “Store”. The registration is copied to the remaining slides to help with scaling (visible also in the filmstrip)
Go through all sections and refine position and cutting angles.
Note
When jumping from one section to the other, wait a few seconds for the image to load
Note
The “restore” button allows you to go back to the saved position if necessary
Save your results in the descriptor file (.waln) by pressing “Save to bucket”.
When the registration is finished, you can export your descriptor files ( .seg files used for analysis in the QUINT workflow) by pressing “export overlays”. All results are zipped and stored in the bucket. The result file name will be the same as the one chosen to create the registration, e.g. “my-registration.zip”.
6. Short keys
To do this |
Press |
Description |
|---|---|---|
Place marker |
Space bar |
Markers are the anchor points of most transformations (stretch and rotate) |
Remove marker |
Esc |
Removes a previously placed marker |
Horizontal stretch from maker |
Left/Right arrow keys |
Marker becomes a vertical line, mouse drag horizontally resizes the cut |
Vertical stretch from maker |
Up/Down arrow keys |
Marker becomes a horizontal line, mouse drag vertically resizes the cut |
Rotate around marker |
PgUp/PgDown |
Marker becomes a cross with a surrounding arc, mouse drag rotates the cut |
In plane adjust |
Click + drag |
If there is no marker, or the marker is a cross, mouse drag slides the cut in its plane (translation) |
7. Control panel
Button |
Function |
|---|---|
Store |
Store the current alignment and propagate to unaligned sections (Note this does not save the series to your bucket) |
Restore |
Reset the current alignment to the last stored position |
Clear |
Reset the current alignment to the default position |
Overlay Slider |
Opacity of the atlas overlay, when fully opaque, it becomes an outline |
Overlay color |
The outline color |
Filmstrip slider and color |
The above settings, applied to the filmstrip |
Save to bucket |
Save the series to your bucket (and overwrite the existing file) |
Export overlays |
Generates a series of .flat files (for Nutil or similar utility), and stores them into a .zip file in the bucket (re-using the name of the series descriptor, e.g. series13.json will export series13.zip) |
Note
The right border of the control panel can be dragged horizontally, allowing to resize the panel and the main view
8. Filmstrip
Drag horizontally to see series, click on a section in order to load it into the main view. The top border of the filmstrip can be dragged vertically, allowing to resize the panel and the main view